Once you have your Word document content in place, proofed and spell-checked, it’s time to add the finishing touches that make a document more attractive to read and more functional. In this article, I’ll show you techniques that add polish to your documents including captioning your images, adding a watermark, creating a pull quote and dressing up your page numbers.
Captioning Images
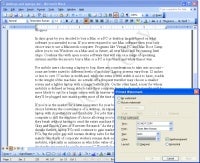
If your document includes a lot of images or tables, captions add another visual element and provide extra information. Add a caption selecting the image or table, and then choosing Insert > Reference > Caption. From the Label drop-down list, select the type of item to caption, such as Figure for image and Table for table, and type the caption details in the Caption line.
To change the type of numbering, click the Numbering button, select a different numbering format and click OK. Captioning is easier to manage if you do it after you’ve completed the rest of the document. Otherwise if you move the images around in the document the caption numbering may not automatically update. If you do move an image, you can manually update its caption. Simply select the caption text and press F9 to update it.
If you’re moving an image, you can group it with its caption so the two travel together. To do this Shift + click on the image and then on the caption, then right-click and choose Group.
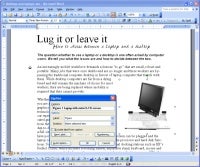
 Add watermarks to your documents to ensure everyone understands their current status. (Click for larger image). |
Add a Watermark
When your document is a draft or its contents are confidential, you can give it a watermark labeling it as such. Select Format > Background > Printed Watermark and select Text Watermark. From the text dropdown list select the appropriate option, Confidential or Draft for example, to use for the watermark.
Next select a font from the font drop-down list, and set its size and color and whether it should be semi-transparent or not. When you click Apply the watermark appears in the document with the current settings. Click Close when you have the effect you want.
You can remove a watermark by choose Format > Background > Printed Watermark, and from the Printed Watermark dialog select No Watermark, and click Close.
Pull Quotes
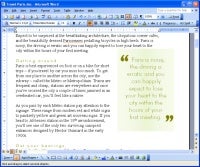
Pull quotes give visual interest to pages that contain a lot of text and no images. You create pull quotes by copying a bit of document text, placing it in a box and formatting it attractively. The text draws the reader’s eye and the different formatting breaks up a text-heavy page.
To create a pull quote, select and copy a sentence or two to use as the quote. Click outside the selected text to deselect it and choose Insert > Textbox and draw a textbox on the screen. Right-click in the box and choose Paste to add the text. Format the quote with a font, font size and line spacing that are noticeably different from the surrounding text. This makes the pull quote stand out from the rest of the document
Format the textbox by right-clicking it and choose Format Textbox > Colors and Lines tab. Set the Fill Color to the color for the box fill and set the Line Color to No Line. Click the Textbox tab and increase the margins to move the text in from the edges of the box.
To finish the pull quote, you can add oversized quote marks. Place each double quote mark in its own text box and format the textboxes with No Fill and No Line. This lets you position them on top of the pull-quote text box so the underlying formatting shows through. To type the double quote marks, hold the Alt key as you type 0147 for an opening quote and use Alt + 0148 for the closing quote marks. Use a font that has attractive double quote marks.
When you are done, click the Select Objects tool on the Drawing toolbar and select the three text boxes by dragging the cursor over them. Right-click and choose Grouping > Group to group them so they move together.
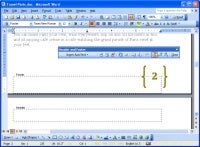
 You can dress up page numbers up with shapes from the AutoShapes collection. (Click for larger image). |
Page Numbering
Word’s page number options are fairly bland, but you can dress them up with shapes. To see this at work, choose View > Header and Footer, click the AutoShapes option on the Drawing toolbar, and select a shape such as a set of double braces. Next, click-and-drag the cursor to create the braces in the document. Right-click them, and choose Format > AutoShape and from the Colors and Lines tab select a Line Color such as Orange and increase the line weight.
To add the page number, click the Textbox tool on the Drawing toolbar and draw a textbox between the braces. Click in the textbox and click the Insert Page Number button on the Header and Footer toolbar. Select a font and font size for the page number, and then right-click the textbox and choose Format Textbox > Colors and Lines tab. Set the Line Color to No Line and set the Fill Color to No Fill. You can drag the braces and textbox closer to the margin to offset them from the page text, if desired.
Armed with a few skills, you can create interesting effects in your Word documents that make them look more professional and more interesting to read.
Helen Bradley is a respected international journalist writing regularly for small business and computer publications in the USA, Canada, South Africa, UK and Australia. You can learn more about her at her Web site, HelenBradley.com
| Do you have a comment or question about this article or other e-commerce topics in general? Speak out in the SmallBusinessComputing.com E-Commerce Forum. Join the discussion today! |


