In the first installment of this series, we explored aspects of the new Windows 7 interface. This time, we’ll take a look at how Windows 7 can make managing and finding files easier.
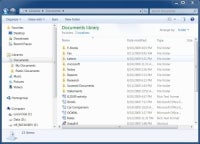
 Windows 7’s libraries provide a single place from which you can manage related files from multiple locations. (Click for larger image). |
Like Windows Vista and XP before that, Windows 7 sets up a series of folders for each user account in which to store various types of data — documents, pictures, videos, downloaded files, etc. (Windows 7’s account folder structure is more or less the same as in Vista, though much more extensive than that of XP.)
In an ideal world, all of your data files would be stored somewhere within your account folder structure so you’d always know where to find them. However, things aren’t always quite so simple. If you’re like most people, over time you wind up with additional data folders elsewhere on your hard drive or on other hard drives (perhaps including external ones). Having data strewn across the system like that can make finding what you want when you want it a challenge.
Welcome to the Libraries
Windows 7 addresses this problem with libraries, which offer an easy way to manage groups of related files even when they’re stored in lots of different places on the system. A library in Windows 7 looks and acts much like a standard folder, but unlike a folder, a library isn’t an actual a physical location where files reside. Rather, a library simply tracks the contents of many different folders and lets you access them all as if they were in the same place.
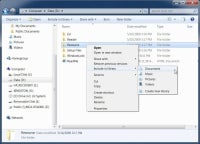
 To add a folder to a library (or to start a new one) right-click and select “Include in library.” (Click for larger image). |
Windows 7 provides four pre-configured libraries for Documents, Music, Pictures and Videos, and each of these libraries consists of two folder locations on the system — the appropriate account folder and the corresponding Public folder. For example, the Documents library includes all files stored in both the Users<account name>My Documents folder and the UsersPublicPublic Documents folder. (Libraries can only contain entire folders, not individual files.)
Accessing Libraries
You’ll find easy access to Windows 7’s libraries via either the Taskbar or Start menu. Launching Windows Explorer from the Taskbar (clicking the button that looks like a group of file folders) will open a window where you can view all the libraries on your system.
Similarly, clicking the Documents, Pictures or Music links found in the upper-right part of the Start menu, will take you directly to the library for that file type. You can view and sort the contents of a library just as you would a folder, and hone in on specific folders within the library by highlighting them within the left-hand navigation pane.
Even though libraries don’t store files per se, you can still access them directly from within applications because libraries are integrated into the Windows 7 common Open/Save file dialog that most — albeit not all — applications use.
When you save a file to a library, it gets saved in the library’s default-save location unless you specify otherwise. For the four standard Windows 7 libraries, the default-save location is always the relevant account folder (My Documents for the Documents Library, My Pictures for the Pictures library, etc.)
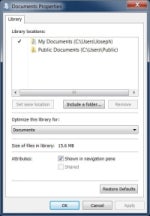
 The libraries’ properties lets you add or remove folders, change the default-save location or optimize for different types of content. (Click for larger image). |
Customizing and Creating Libraries
You can customize any of Windows 7’s pre-configured libraries by adding your own folders to them or create entirely new libraries of your own. The easiest way to add a folder to an existing library is to right-click it in Windows Explorer and select Include in Library – a pop-out menu will let you choose which library to add the folder to.
Another way to add folders to a library is to right-click a library name within a window and select Properties. Here you can see a list of the folders that are currently part of the library and add new folders by clicking Include a folder and browsing to the one you want.
Although it’s not as clear as it should be, the folder with the check mark next to it is the library’s default save location, which you can change by highlighting a new folder and clicking Set save location.
The same right-click menu you use to add a folder to a library also includes a Create New Library option, which will immediately set up a new library with the same name as the folder (you’re free to change the name afterward.) You can also create a new library via the New Library button available when you view your group of libraries from the Taskbar.
A library can include folders located anywhere on an internal or external hard drive, though the external drive must be connected for its contents to be accessible. Libraries cannot include folders from a DVD/CD disc, nor from a flash memory drive (except in rare circumstances — when Windows recognizes the flash drive as a hard drive rather than removable storage).
Folders from a network can be added to a library provided they reside on a Windows system/server that is indexing them (cataloging them for search purposes). Making a network folder available offline — which creates (and synchronizes) a local copy of the network folder — is another way to make it part of a library. The offline folder capability is only available in Windows 7 Professional, Enterprise or Ultimate — just right-click a folder and select Always available offline.
Other important library facts: a library can contain a maximum of 50 folders, a folder can be a member of multiple libraries, and a library can contain multiple types of data, which means you can have a library that contains, say, documents, images and other materials that are all associated with a particular project. Also, removing a folder from a library or deleting a library has no effect on the files it contains.
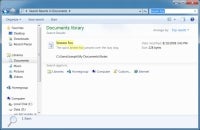
 Windows 7’s integrated search is faster than Vista and XP, and it displays clearer, easier-to-read results. (Click for larger image). |
Seek and Ye Shall Find
Anyone who has lamented Vista or XP’s slow and clunky built-in search tools will appreciate Windows 7’s vastly improved — in both speed and usability — search capabilities. Windows 7 automatically indexes the folders likely to contain a user’s data, such as the account folders and any folder that’s part of a library.
The Start menu’s search box now provides a convenient place to search for not just for files and programs, but myriad configuration settings from the Control Panel as well. The search box found in the upper corner of every Windows 7 window has also been tweaked to make finding information easier.
Search results don’t simply list found files — instead, they’re displayed in an easy-to-read format with search terms highlighted within the results so you can easily identify whether they appear in the file name, the contents, or both.
You can also pare down search results by applying a succession of filters (when searching libraries, filters are content-specific like file type, date, author, etc.) directly from the search box.
Next time, we’ll wrap up this series with a look at a few of Windows 7’s business-centric features, such as Windows XP Mode, which lets you avoid compatibility problems with older applications.
Joseph Moran is a veteran technology writer and co-author of Getting StartED with Windows 7, from Friends of ED.
| Do you have a comment or question about this article or other small business topics in general? Speak out in the SmallBusinessComputing.com Forums. Join the discussion today! |

