Lists are a great way to organize data in documents, and they make it easier for readers to understand key points. Microsoft Word has a tool to create simple numbered and bulleted lists, and you can also customize these lists to suit your needs. In this article, I’ll show you how to create lists, how to choose the right list for a task, and how to customize them.
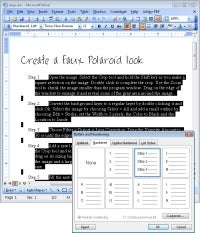
 Using numbers signifies that the list items are in order or identifies them so they can be referred to more easily. (Click for larger image). |
Why Create Lists?
A list is a good way to organize items in a document because it forces you to work in a compressed and shortened format, which makes your writing easier to read. You can use lists for everything from step-by-step instructions to a series of points that you want to make and more. When writing step-by-step instructions, be sure to use a verb as the first word in the instructions. This forces you to be even more succinct.
Use bullet lists when the order of the items in the list doesn’t matter. For example, you might create a bulleted checklist of items if the actions on the list don’t have to be completed in any particular order. You can easily create a checkbox bullet using a symbol font character.
Where order is critical, such as in step-by-step instructions, use a numbered list rather than a bulleted list. Numbers reinforce the suggestion that sequence is involved, and that anyone reading the list should progress from item 1 to item 2 and then 3 and so on. Numbers are also useful for non-ordered items when you want to make it easier for someone to refer to them later on — such as “In reference to item 2…”
 With multi-level lists like this bulleted list you can create custom bullets for each individual level. (Click for larger image). |
How to Create a List
You can create a list as you type it or after you’ve finished typing it. To create a list as you type, click the Numbering or the Bullets button on the Formatting toolbar, and a new number or bullet will appear automatically. Type the first list entry and press Enter to show the next number or bullet. Continue to type the list, and when you are done, click the Numbering or Bullets icon to turn the feature off.
To create a list after you have typed the entries, highlight the list and click either the Numbering or Bullets icon.
Special List Options
When you need a two-level list, you can create the second level by clicking the Increase Indent button on the Formatting toolbar. This increases the indent for this list item and the numbering or bullet character changes, too. Continue to add other second level list items, and when you want to go back to the first level click the Decrease Indent button.
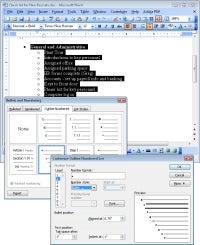
If the bullets or numbering sequences are not exactly what you want, you can format them to suit your needs by choosing Format > Bullets and Numbering > Outline Numbered. The outline style that you are currently using will be highlighted, and you can change it by selecting another outline style and clicking OK to apply it.
 With multi-level lists like this bulleted list you can create custom bullets for each individual level. (Click for larger image). |
Alternatively, you can customize the style by clicking the Customize button. On the left you’ll see Levels: 1, 2, 3, 4 and so on. Click Level 1, and you will see the format currently applied to the first level list item. When you click Level 2, you will see the style currently applied to Level 2.
You can change the style by selecting a different option from the Number Style dropdown list. For example, you can choose a bullet style from the list or select New Bullet and select a bullet character from the currently selected symbol font or from any other font and click OK.
Typically most lists only require one or two levels but, if you need more, you can continue and configure different bullets or numbering options for lower levels. When you are done click OK and your list will be formatted using your new design.
Multiple Lines
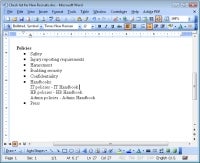
When you need a new line but you don’t want that line to have a bullet or a number, hold the Shift key down when you press Enter. This adds a new line but without a bullet or number, and you can continue to do this to type multiple lines with just one bullet or number. For example if your bullet item is “Handbooks” and you want to list the various types — IT, HR and Admin — under the Handbook bullet. When you’re ready for the next number or bullet, press Enter without the Shift key.
Create Step-By-Step Lists
For step-by-step lists you can configure the numbering so that the word Step automatically replaces each number. First, create a numbered list. Next select the list text, and choose Format > Bullets and Numbering. Select the Outline Numbered tab and the option that you’re currently using, and click Customize. In front of the number format for Level 1, type the word “Step” and a space, and click OK.
Now each number will have been replaced with Step 1, Step 2, Step 3 and so on.
Moving List Items
One advantage to numbered lists is that you can reorder the items in the list and the numbering changes accordingly. So, if you move a paragraph up or down the list, the numbers will change depending on the paragraph’s position in the list. To move a paragraph use Alt + Shift and the Up or Down arrow keys.
Whenever you need to type a series of items marked with numbers or bullets, you will find Word’s bulleted and numbered list options a useful tool for formatting your data.
You’ll find lots more software tips and tutorials from Helen Bradley in our Small Business Essential series, How-To With Helen Bradley.
Helen Bradley is a respected international journalist writing regularly for small business and computer publications in the USA, Canada, South Africa, UK and Australia. You can learn more about her at her Web site, HelenBradley.com
| Do you have a comment or question about this article or other small business topics in general? Speak out in the SmallBusinessComputing.com Forums. Join the discussion today! |


